
How to Put Electricity In a Shipping Container: 4 Steps

Do you want to know how to put electricity in a shipping container?
Whether converting a shipping container into a cozy living space, office, or storage unit, you'll need to understand how to put electricity in a shipping container. Proper electrical installation ensures you'll have the power you need for lighting, appliances, and heating while keeping everything safe.
In this guide, we'll walk you through each stage of setting up electricity in your shipping container, covering prep, installation, and essential maintenance tips.
Before we start, it's always recommended to hire a licensed electrician for any electrical work including putting electricity in a shipping container.
Step 1: Preparing Your Shipping Container for Electrical Installation
Before starting, create a clear plan for your container's electrical needs. Consider your floor plan, the function of each area, and the necessary outlets and lighting fixtures. A container office or residence, for example, will require different wiring setups than a storage or workspace.
Luckily, single shipping containers are a small space. So electrical plans for shipping containers should not be complicated. In most cases, a couple of lights and a few outlets are sufficient.
However, if you are using the container as a workshop with welders and power tools that require a heavy draw, additional planning may be required.
Set Up Your Electrical Goals
- Room Functionality: Determine the purpose of each space to decide how many outlets, lights, and fixtures you need.
- Electrical Load: List all intended appliances and devices to estimate your container's power requirements.
- Local Codes & Permits: Research local regulations and necessary permits, as residential and commercial electrical codes may differ.Hiring a licensed electrician can streamline this process and help you meet all safety requirements.
A clean container ensures that wires are laid safely, without interference from dust or debris. Remove any contaminants and insulation to create accessible pathways for wiring.
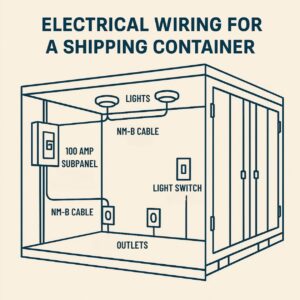
Step 2: Wiring the Shipping Container
Once the groundwork is laid, it's time to begin wiring. For safety and quality, always hire a licensed electrician to handle this part, as improper wiring can lead to serious hazards like electrical fires or equipment damage.
NM-B cable is commonly used for wiring. “NM” stands for non-metallic, meaning the outer jacket is made of plastic, not metal. “B” indicates the cable has a heat rating of 90°C (194°F).
Key Wiring Considerations
Route the Wires Safely
An electrician will handle the wiring, avoiding sharp bends and positioning wires away from heat sources like furnaces or direct sunlight to prevent damage. They'll also use moisture-resistant materials to safeguard against humidity and ensure durability.
Install Junction Boxes
Junction boxes protect electrical connections from dust, moisture, and debris, making troubleshooting easier and keeping your setup safe. Proper installation by a certified electrician is essential to meet code standards and prevent electrical shocks.
Set Up Outlets, Switches, and Fixtures
The placement and quantity of outlets and fixtures depend on your layout and anticipated usage. If you plan to include outdoor lighting or garden power access, account for extra outlets. Proper planning here can save on costs and improve usability.

Step 3: Choosing the Right Power Source and Ensuring Safety
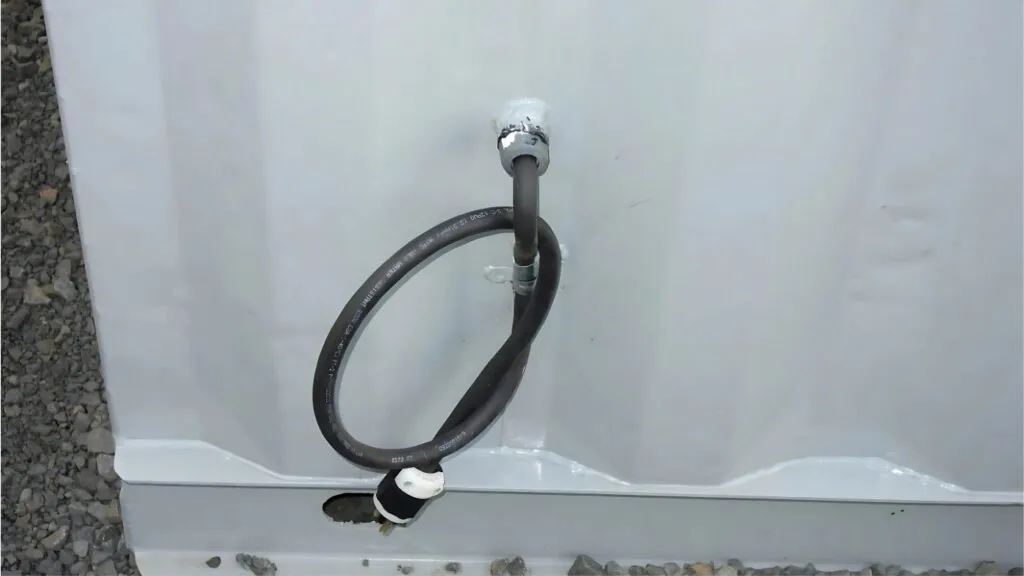
Your container needs a reliable power source to function correctly, so consider options like connecting to a nearby electrical grid or using solar panels or a generator for remote locations.
Essential Safety Features
- Circuit Breakers and Fuses: Protect against overloads and short circuits.
- Grounding: Minimizes the risk of electric shocks.
- Fire Detection: Install smoke detectors and fire alarms as extra precautions.
- Emergency Exits: Plan clear exit paths for emergencies, especially if the container will be used as a living or work area.
Testing the electrical system is crucial before moving into the container. Have your electrician inspect all connections, outlets, and fixtures to ensure they work as expected and are installed safely.
Step 4: Maintaining, Repairing, and Upgrading Your Container's Electrical System
Once your electrical system is up and running, it will need periodic maintenance to remain safe and functional. Like a car, even a newly installed system benefits from regular checkups.
- Routine Inspections: Have a professional check the wiring, outlets, and switches periodically for signs of wear or damage.
- Appliance Upgrades: As needs change, replace old appliances with energy-efficient models to conserve power and meet evolving requirements.
- Electrical Panel Upgrades: Over time, you may need to upgrade your panel to accommodate more equipment or increased power demands.
Adding Electrical To Shipping Containers: Modifications by Dry Box
Dry Box can make custom modifications to your container including adding electrical to shipping containers.
Dry Box offers 3 shipping container electricity solutions; a basic “Pigtail Package,” a 20ft Subpanel Package and a 40ft Standard Subpanel Package.
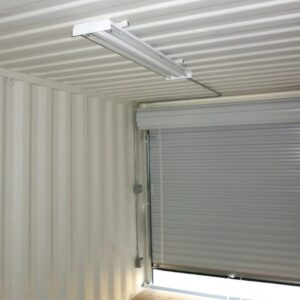
- The Pigtail Package includes two 4ft ceiling lights, two outlets, one light switch, one junction box and a 10-inch pigtail to plug into a 10 gauge 110v extension cord. This plug-and-play package provides ample light and enough power to power most tools, a laptop, and a portable drill charging station.
- The 20ft Subpanel Package is a circuit protected electrical package that includes one electrical outlet per wall (4 total), one light switch, two 4 ft lights and 120v 100-amp power distribution panel with a main and three circuit breakers installed. Additional charges apply for additional circuit breakers.
- The 40ft Standard Subpanel Package is a circuit protected electrical package that includes 6 electrical outlets, 1 light switch, four 4 ft lights and a 100amp distribution panel with one main and up to 3 circuit breakers.
Off-Grid Power Solutions For Shipping Containers
If you're setting up a shipping container in a remote location—like a hunting cabin, a backwoods homestead, or a barn far from the utility grid—you'll need off-grid power solutions.

Here are three common and effective off-grid power options for shipping containers:
1. Gas Generators
Gas-powered generators are one of the fastest ways to get electricity to your container. They're ideal for short-term or seasonal use—such as in hunting cabins, temporary workshops, or during power outages at a farm. These units run on gasoline, propane, or diesel and can power lights, small appliances, and tools. The downside? They're noisy and require regular refueling. But if your container isn't used every day, a gas generator can be a reliable and low-cost power source.
2. Battery Power Banks
Battery banks are a quiet, low-maintenance option that store energy for when you need it. These can be charged at home and transported to the site, or recharged using solar panels or small generators. Battery systems work great for low-draw applications like LED lights, phone charging, fans, and small water pumps. For example, if you're converting a container into a remote livestock shelter or tool shed, a battery setup keeps things running quietly and efficiently. Popular battery power station brands include Jackery, Anker, and EcoFlow,
3. Full Solar Power System
For long-term, daily use—like in a homestead, full-time off-grid office, or agricultural setup—a solar power system is the most sustainable option. It includes solar panels, a charge controller, a battery bank, and an inverter. While the upfront cost is higher, solar requires little maintenance and pays off over time. A 1,000–2,000 watt setup can power lights, a fridge, tools, and even Wi-Fi if needed. Solar is perfect for barn setups where you don't want to string overhead wires or pay for costly trenching.
Each of these power options fits different needs. For occasional use, go with a generator. For quiet and portable power, consider a battery bank. For long-term, reliable energy, solar is hard to beat.
Create a Safe, Livable Space with Electricity in Your Shipping Container
Adding electricity to a shipping container can transform it into a versatile and livable space, but safety and proper planning are key. By following these steps and working with a licensed electrician, you can ensure a setup that meets your needs and complies with all local codes.