
How To Install A Window In a Shipping Container
Quick Answer: To install a window in a shipping container, mark and cut an opening in the steel wall with an angle grinder or plasma cutter, weld a steel frame around the opening for support, set the window in place and fasten it, then seal the edges with butyl tape and silicone to keep it weather-tight. Finish by priming and painting any exposed cut steel to prevent rust.
Most installs take a full weekend for a DIYer or let a Dry Box pro handle it.
Adding a window to a shipping container is one of the most common modifications customers ask about, and for good reason.
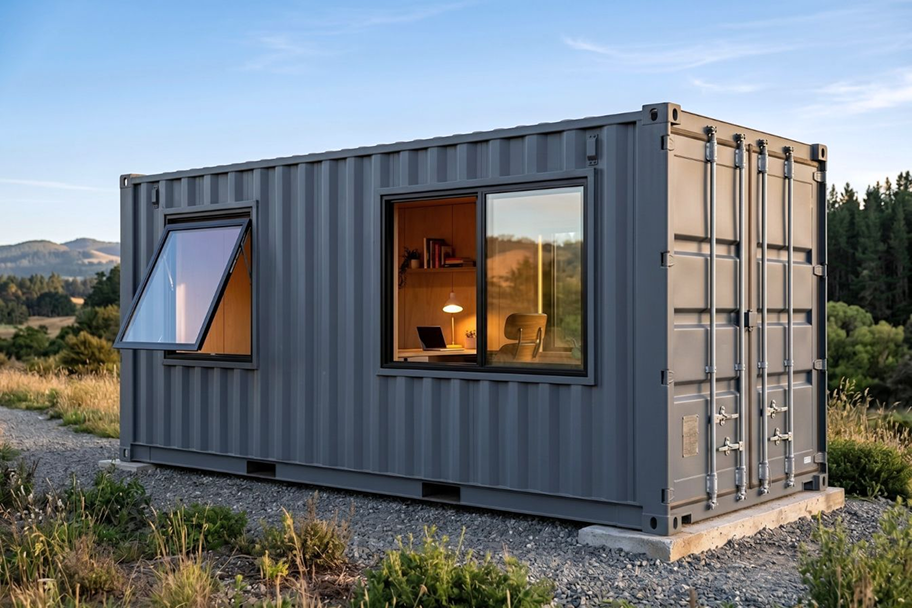
A simple cutout transforms a dark steel box into a bright, livable space that meets code for container offices, cabins, and homes.
This guide walks through the benefits, the different types of windows for shipping containers, the full DIY process, and the cost breakdown of doing it yourself versus hiring a professional team like Dry Box.
Why Installing a Window in a Shipping Container Adds Value
Shipping containers are tough, weather-tight, and built to last. They were designed to move cargo across oceans, not to be lived in or worked in. Adding a window changes that completely.
A container with windows feels less like a metal box and more like a real room. Natural light brightens the space, fresh air circulates, and the inside stays cooler in summer. Container modifications like windows are one of the most common upgrades our customers request.
The benefits of installing a window in a shipping container go beyond looks. Many local building codes require windows for any container used as a home, office, or workspace.
According to the U.S. Department of Energy, heat gain and loss through windows accounts for 25-30% of residential heating and cooling energy use, so picking the right window matters.
Here are the top reasons people add shipping container windows:
- Natural light reduces electric bills and improves mood inside the space.
- Ventilation prevents condensation, mold, and stuffy air.
- Code compliance for habitable spaces, including egress in bedrooms.
- Resale value increases when a shipping container for sale includes useful modifications.
- Comfort for offices, workshops, container cabins, and container homes.
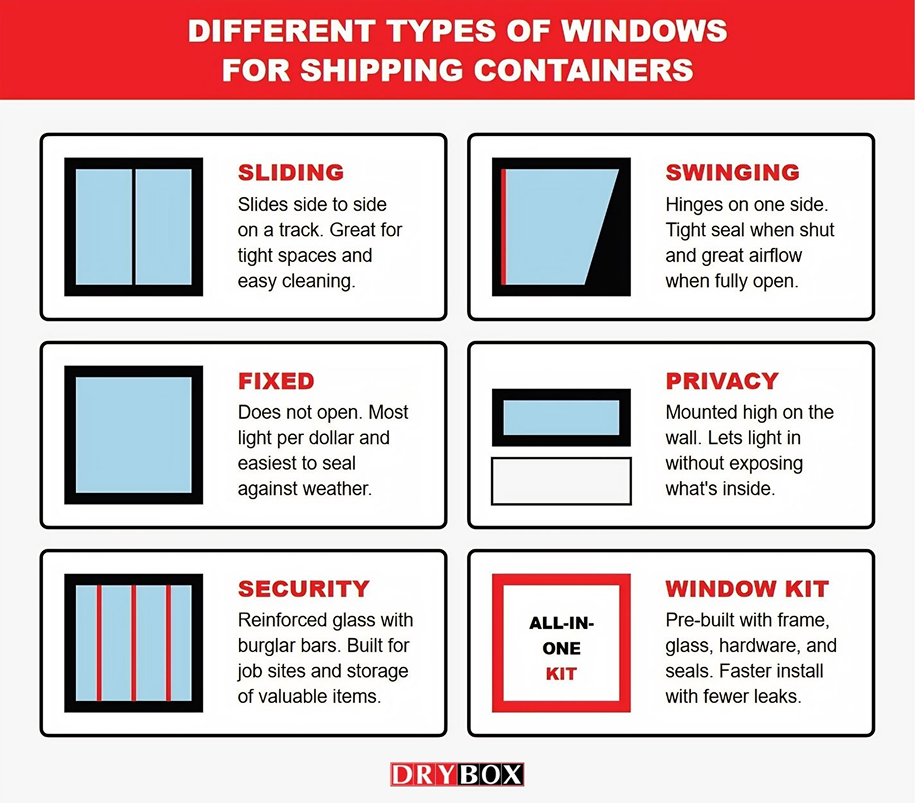
Different Types of Windows for Shipping Containers
Picking the right window matters as much as the install itself. The best choice depends on how you plan to use your 20ft container or 40ft container.
Below are the most popular types of windows used in container
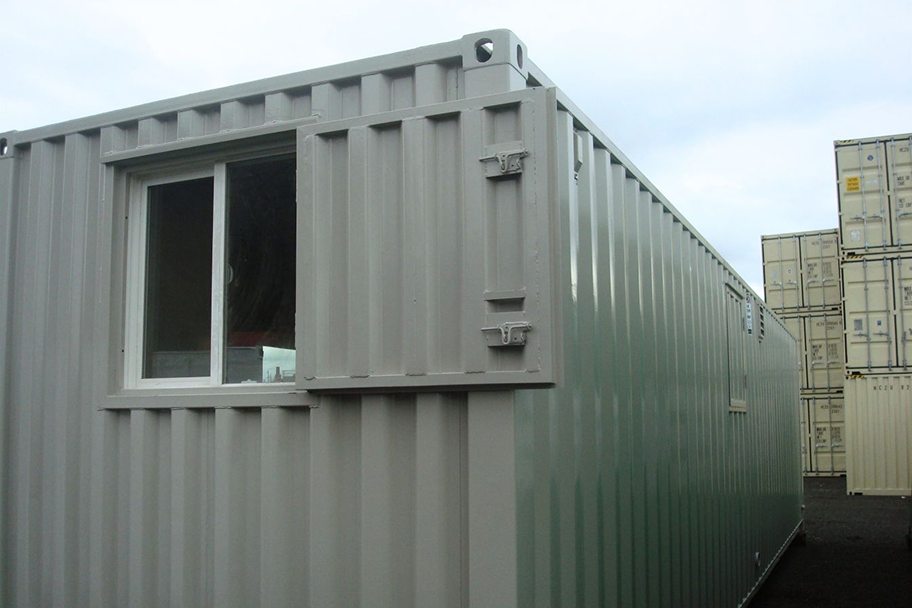
Sliding Windows
Sliding windows open horizontally along a track. They are space-saving since nothing swings inward or outward, which makes them perfect for tight container interiors. They are easy to clean, simple to operate, and offer good airflow when partially open.
Swinging Windows (Casement and Awning)
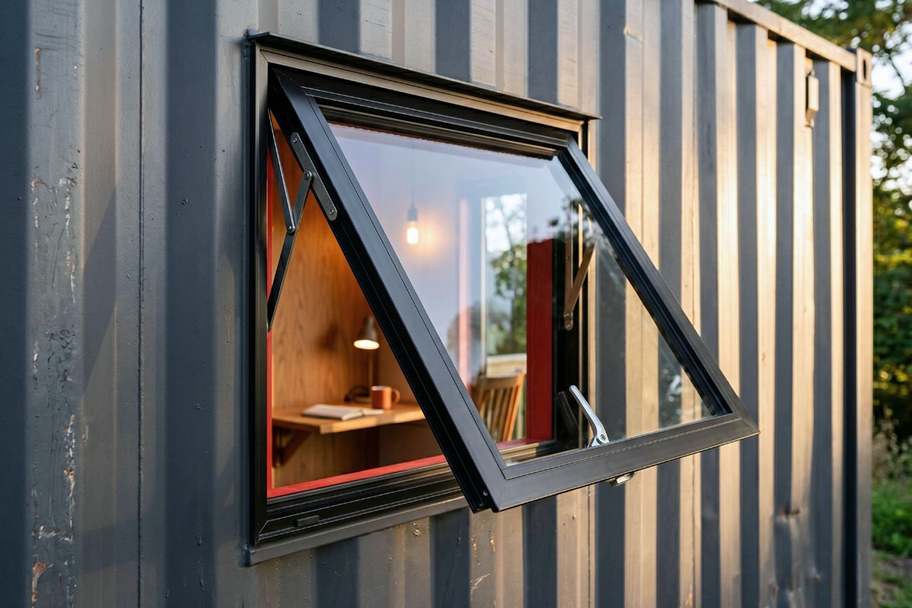
Swinging windows hinge on one side and open like a door. Casement styles hinge on the side and crank outward, while awning styles hinge at the top. Both seal tightly when closed, which improves insulation and weather resistance.
Fixed Windows
Fixed windows do not open. They bring in the most natural light per square foot and are the cheapest option. They work well for containers used as offices, retail kiosks, or display rooms where ventilation comes from a separate door or HVAC.
Privacy and Security Windows
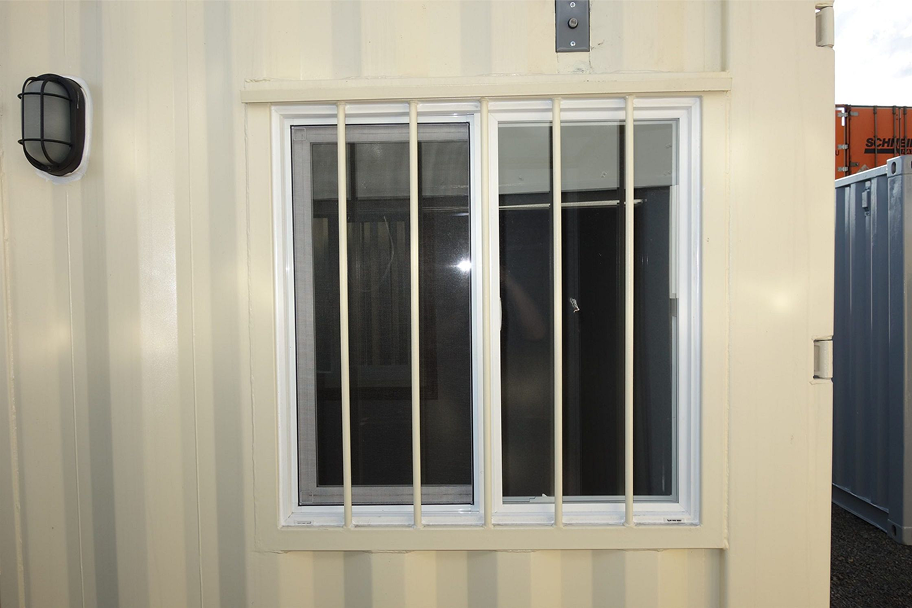
These sit high on the wall, near the ceiling. They let light in without giving passersby a view of your inventory or workspace.
Many customers add burglar bars or steel shutters to a for extra security.
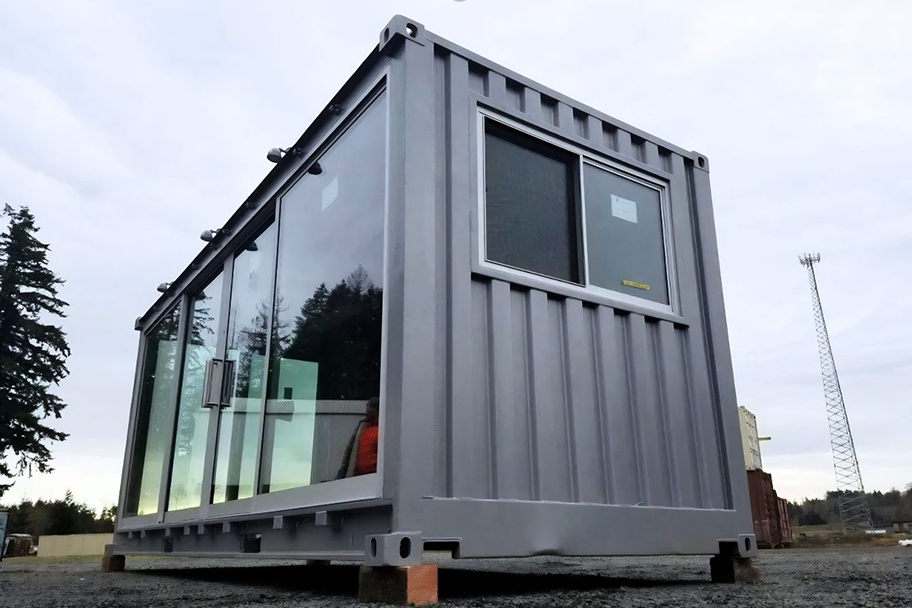
Shipping Container Window Kit
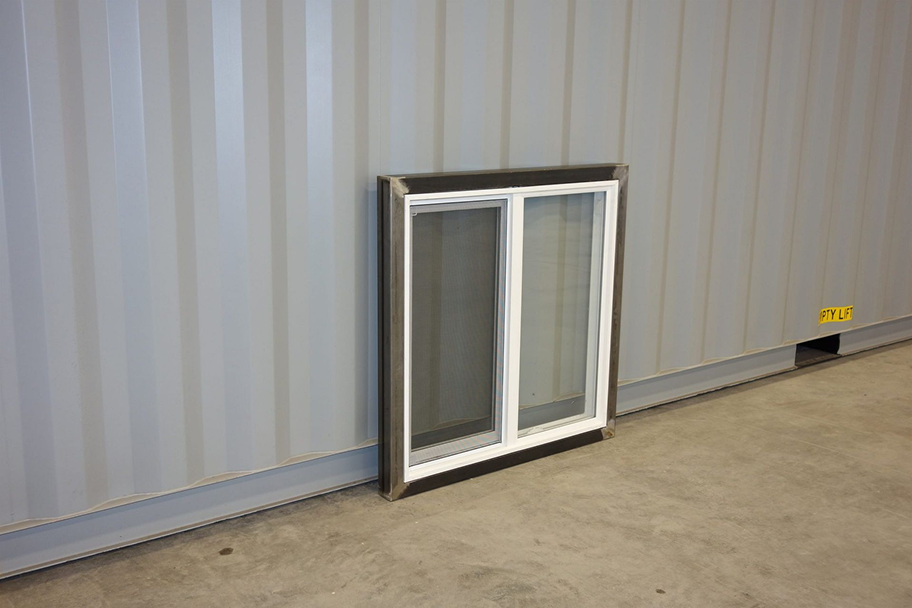
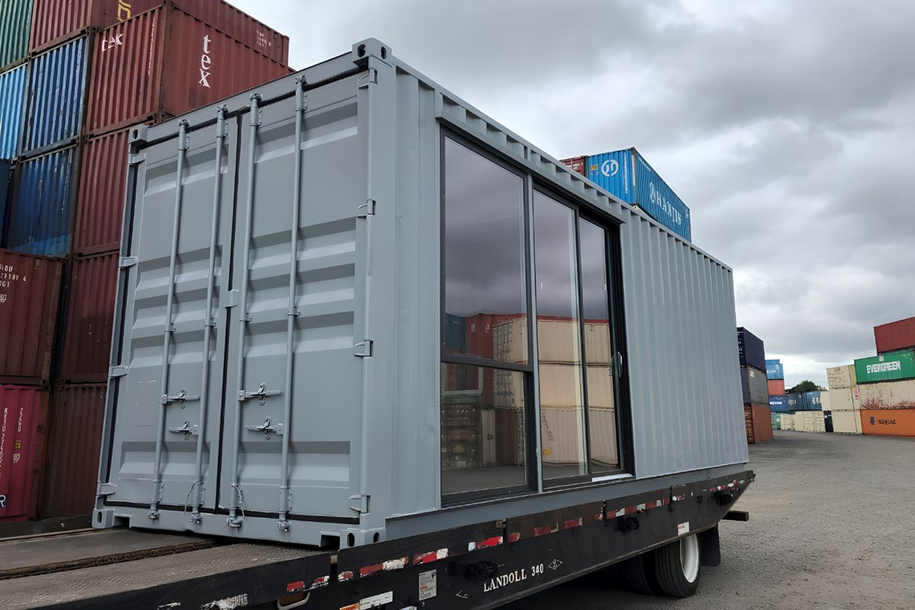
A shipping container window kit comes pre-built with the frame, glass, hardware, and seals all sized for a standard container wall. These kits cut installation time in half and reduce the chance of leaks. Container window kits from Dry Box are 36" x 36" sliding models with security bars.
Skylights
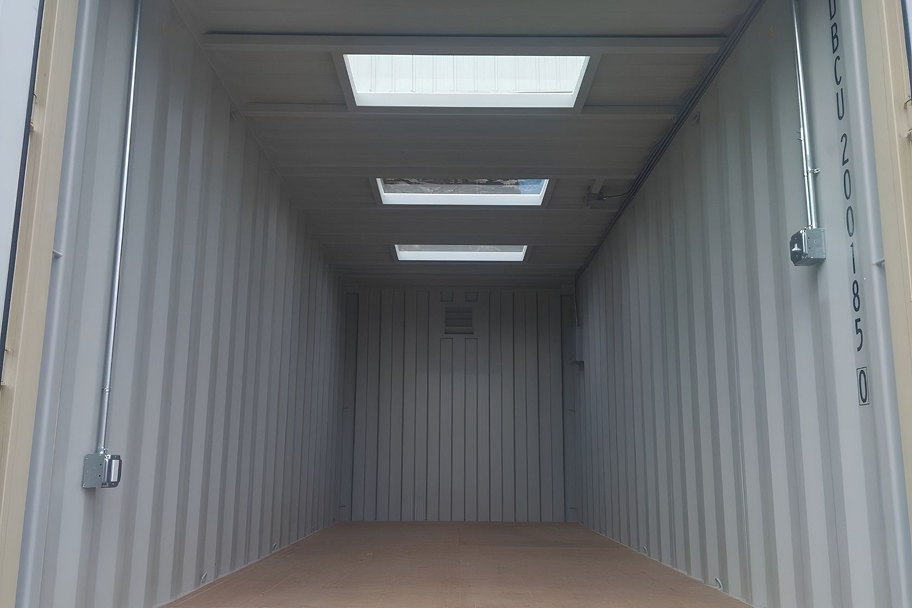
Skylights cut into the roof of a container instead of the side walls. They flood the interior with overhead light without sacrificing wall space or privacy. This makes them a popular pick for container offices, art studios, and tiny homes where every wall counts.
Installation follows the same basic process as a side-wall window, but you'll need to add proper flashing and a slight pitch to keep water from pooling on the roof. A skylight pairs well with side windows for cross-lighting that brightens the whole space.
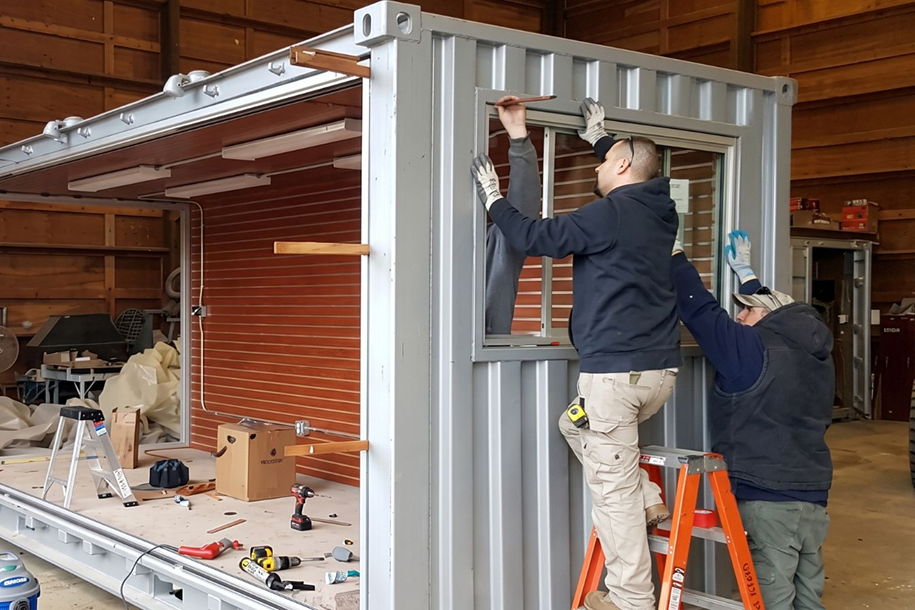
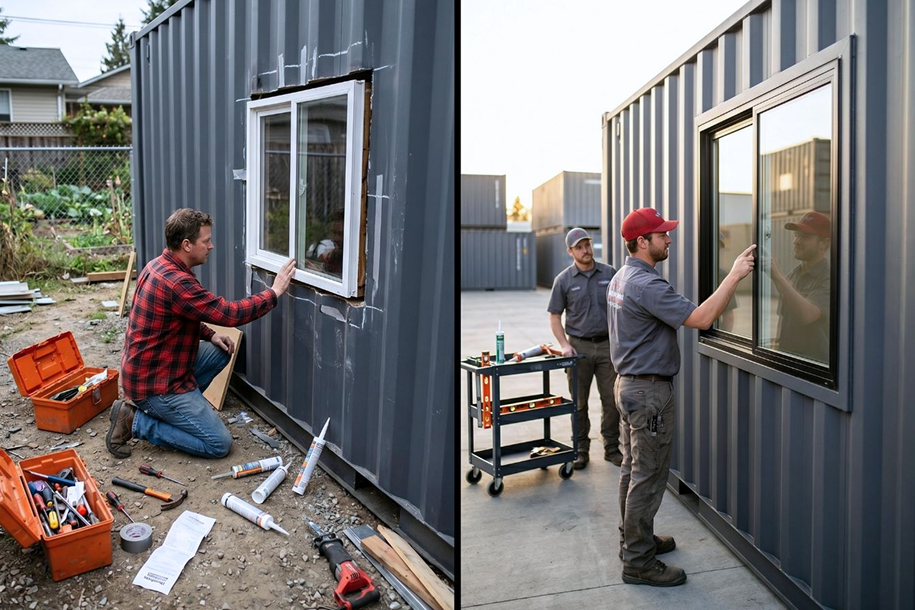
How To Install A Window In A Shipping Container: DIY Step-by-Step
Putting a window in a shipping container is a real construction project. You'll be cutting through 14-gauge corrugated steel, so safety gear and the right tools are required. Always check local building codes and consult a professional before you start, since modifications often require permits.
Tools and Materials You'll Need
- Angle grinder with cutting and grinding discs
- Plasma cutter (optional but faster than a grinder)
- Measuring tape, square, and chalk line
- Welder and welding mask, OR self-tapping metal screws
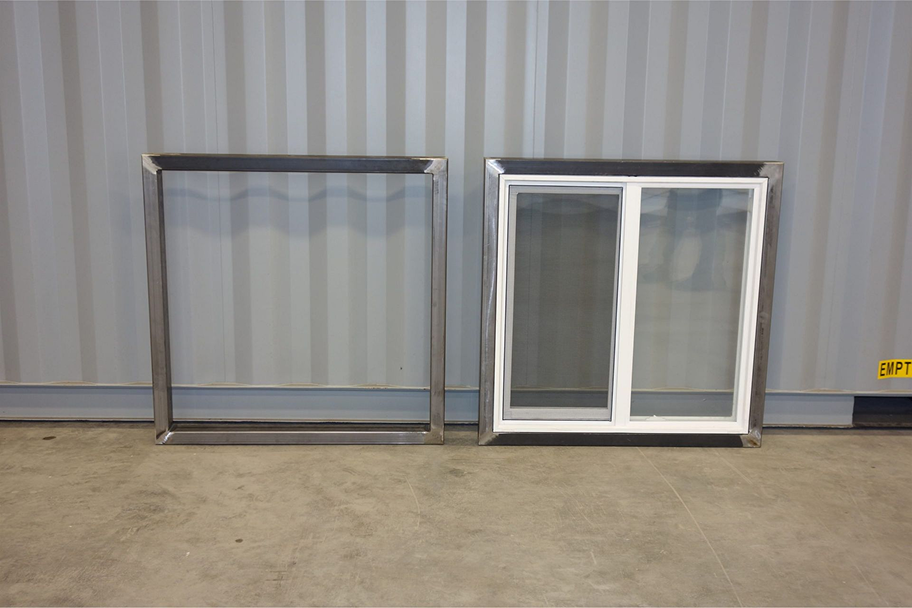
- 2x4 steel tubing or angle steel for the frame
- Window unit or shipping container window kit
- Silicone sealant and butyl tape
- Rust-resistant primer and exterior paint
- Safety glasses, gloves, ear protection, and a respirator
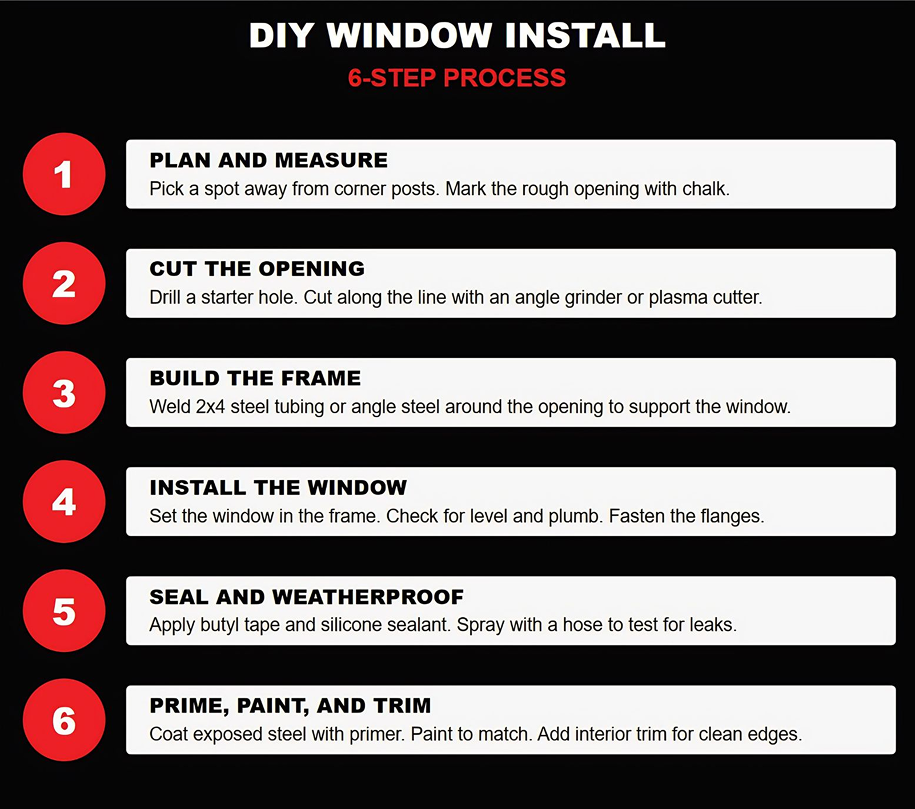
Step 1: Plan and Measure
Decide where the window goes. Avoid cutting through the corner posts or the top and bottom rails, since those carry the structural load of the container. Mark the rough opening on the inside wall, leaving room for the frame and a small expansion gap on each side.
Step 2: Mark and Cut the Opening
Use a chalk line to outline the cut. Drill a starter hole in one corner so your cutting blade has a place to enter the steel. Cut slowly along the line with an angle grinder or plasma cutter, then knock out the steel panel.
Step 3: Build the Frame
Frame the opening with 2x4 steel tubing or angle steel. Angle steel is often easier than tube steel because it sits flat against the corrugated wall. Weld the frame in place, or use heavy-duty self-tapping screws if you don't have welding equipment.
Step 4: Install the Window
Set the window into the new frame, check that it sits level and plumb, and secure it according to the manufacturer's instructions. Most windows attach with screws driven through pre-drilled flanges into the steel frame.
Step 5: Seal and Weatherproof
Apply butyl tape behind the window flange before fastening. Run a continuous bead of silicone sealant around the outside edge where the window meets the container wall. Test the window by spraying it with a hose to check for leaks.
Step 6: Prime, Paint, and Finish
Any exposed cut steel will rust fast if you don't seal it. Hit the bare metal with rust-resistant primer, then paint over it with exterior-grade paint that matches your container. Add interior trim to cover any rough edges and clean up the look.
Cost: DIY vs. Professional Installation
Installing a window in a shipping container yourself can save money, but it takes time, tools, and skill. Hiring a pro means a faster, weather-tight result that won't void any warranties on your container. Here's how the numbers usually break down.
Shipping Container Window Cost DIY Breakdown
If you already own the cutting and welding tools, a basic DIY shipping container window install runs around $500 in materials. A full shipping container window kit with security bars runs around $650 without security bars and about $750 with bars.
Add another $50 to $150 for sealants, paint, framing steel, and fasteners. If you need to rent or buy tools, factor in another $200 to $500. The biggest hidden cost is time, since most DIY installs take a full weekend per window.
Professional Installation with Dry Box
A professionally installed window through Dry Box typically runs around $1200 depending on size, style, and security features. That price includes the window, structural reinforcement, weather sealing, paint matching, and a clean interior finish.
For most customers, the time saved and the quality of the finish make professional installation the smart choice. Dry Box can also bundle the window install with other upgrades like shipping container doors, electrical, insulation, and HVAC.
Frequently Asked Questions
How much does it cost to install a window in a shipping container?
The DIY cost for installing a window in a storage container is around $500. The cost for professional installation is around $1200.
Do I need a permit to install a window in my shipping container?
In most cases, no. But permanent containers connected to utilities or used as habitable spaces fall under the International Residential Code or International Building Code. Always check with your local building department before cutting into the steel walls.
Will adding a window weaken my shipping container?
Cutting any large opening in the side wall reduces lateral strength. Adding a steel-tube or angle-steel frame around the opening restores most of that strength. For container homes, IRC Chapter 6 may require an engineered header, so consult a professional engineer for residential builds.
How long does it take to install a window in a shipping container?
A skilled DIYer with the right tools can finish one window in 6 to 10 hours. First-timers should plan for a full weekend per window. Dry Box's professional team usually installs a single window in 2 to 4 hours per unit.
Can I put a window on the door end of a shipping container?
Yes, but it's harder. The door end has the cargo doors, hinges, and locking bars in the way. Most installers prefer the long side walls or the closed end wall for cleaner cuts and easier framing.
Will the window leak if I install it in winter?
Cold weather can keep silicone sealant from curing properly. Most sealants need temperatures above 40°F to bond well. If you have to install in winter, use a low-temperature sealant rated for cold-weather application and follow the manufacturer's cure times.
Ready to Add Windows to Your Shipping Container?
Skip the angle grinder and get a perfectly installed, weather-tight window from Dry Box. Our team handles cutting, framing, sealing, and finishing so your container is ready to use the day it arrives.
Request a free quote or call 3602620500 to talk to a specialist about container modifications in Washington, Oregon, Idaho, Montana, Utah, Nevada, Colorado, Wyoming, and Florida.
Dry Box provides storage container rentals and new and used shipping containers for sale with professional modifications across Washington, Oregon, Idaho, Montana, Utah, Nevada, Colorado, Wyoming, and Florida. Call 360-262-0500 or visit DryBoxUSA.com to get your free quote today.
Call us today or fill out our quote form here.